The N2 Installation Wizard
- Ben Herila
- Anonymous
These steps assume you have already set up the files for your N2 installation. If you have not yet done that please see Prepare for Installation.
When you navigate to your site's root (~/) you should be redirected to the N2 installation wizard.
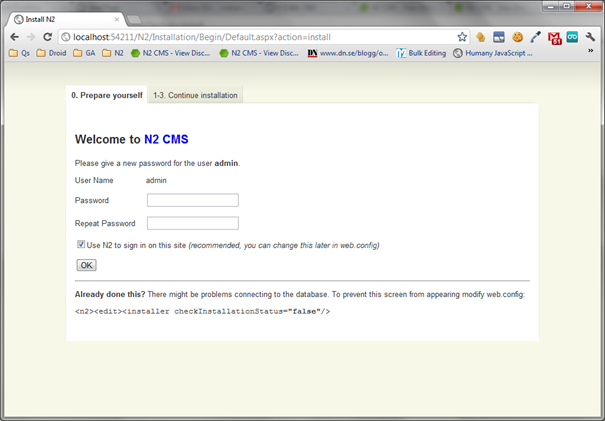
Set a password for your new site. Leave the checkbox selected (you can change this later in web.config if you wish)
Click on help me install a database for a new site
Log in using the username admin and password you just wrote. Continue to create tables. Now is the good time to update the connection string to another database if you don’t want to use SQLite.
If you are installing N2 in an existing database, the N2 setup wizard will drop any tables that have conflicting names with N2's tables. We recommend that you install N2 in its own database.
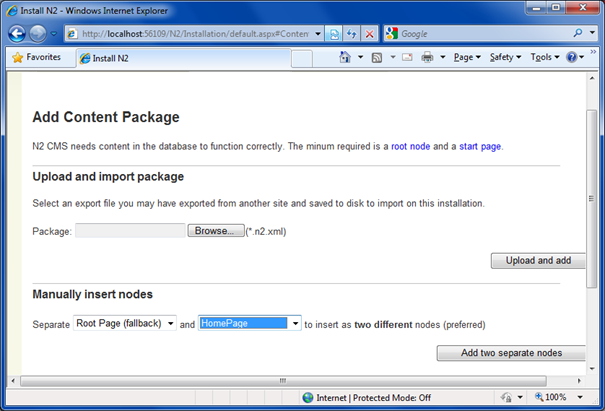
On step 2. Content Package go to Manually insert nodes and insert a “Root Page (fallback)” and HomePage and click Add two separate nodes.
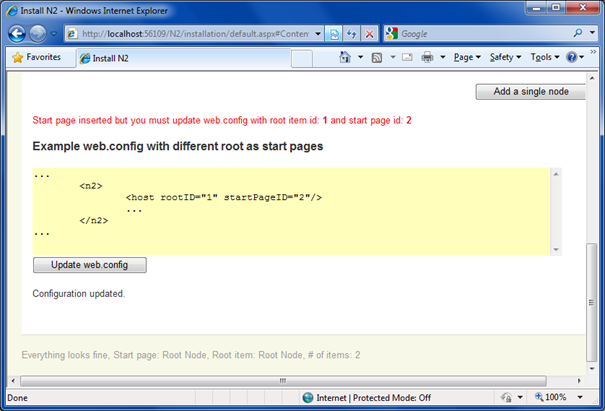
If necessary, scroll down and click Update web.config.
On the finishing touches click on disable installation. This will make this installation wizard unavailable. To re-enable it, set allowInstallation to true in web.config (this is needed for upgrade).